Reverse Engineering InstallShield 5 Serial Key Verification
Gabriel Hawkins 6/12/26
LEGAL NOTICE – This article is for educational purposes only. Nothing contained here is proprietary information belonging to MetaCreations or InstallShield. It is solely a reverse engineering experiment conducted on legally obtained software in a personal lab environment. Do not use these techniques to pirate software.
As someone who as a kid installed 40 Sony Vegas Pro 6 keygens, I have always been enamored by how someone makes something like this. Except for the 100db background music and now every time I search something it redirects to Yahoo now, its always fascinated me. So now as a way to improve my Reverse Engineering skills I decided it was time I make one of my own. I decided to start at close to the begiinning with this interesting product I found.
MetaCreations Poser 4 from 1999.
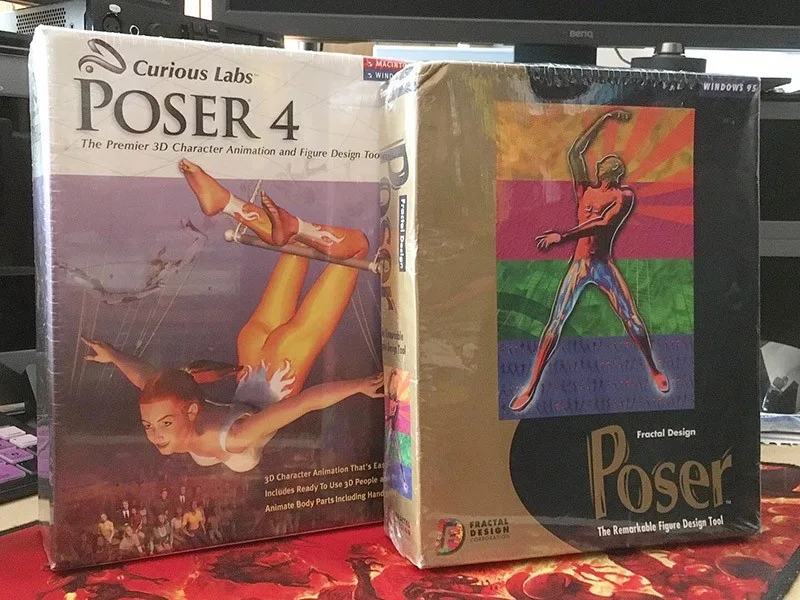
Step 1: Investigation
I wonder if any of the people who made this are still around?
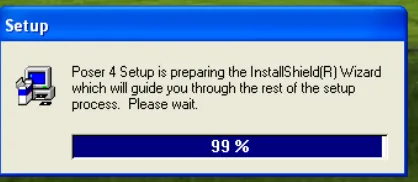
I started off with simply going through the instillation process myself. After opening setup.exe your greeted with a long pause, a message box in the corner saying "Preparing the InstallShield(R) Wizard" (odd) before the main event.
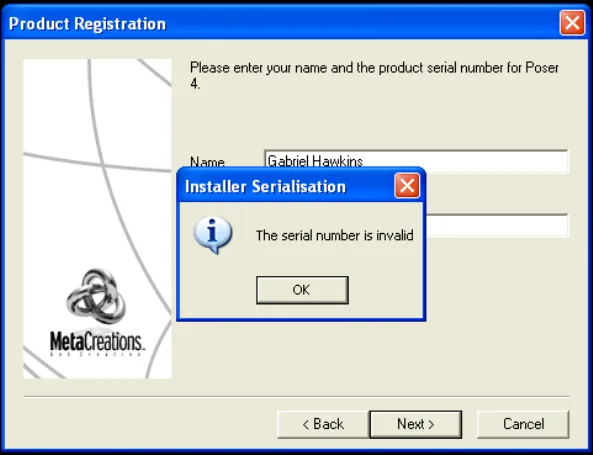
Once the real setup launches however, we are graced by the glorious "Enter your name and Serial Number" which I do have but where's the fun in that. Lets figure out how this works and make our own. I knew this was going to be challenging, however, I underestimated how difficult dealing with Install Shield was going to be.
Firstly I'm going to investigate the rest of the CD, the clues are sitting somewhere.
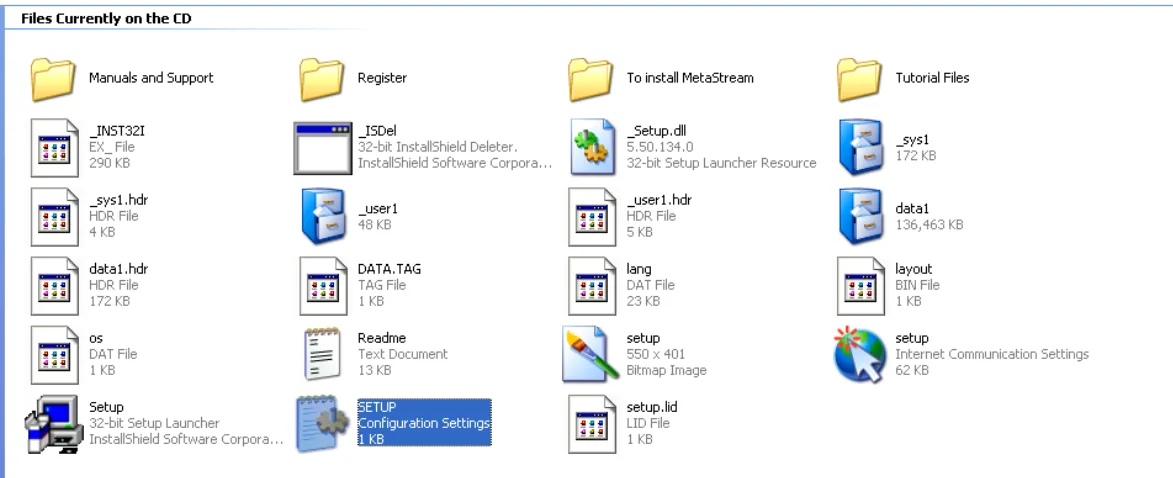
The rest of the drive has a lot of random files on it. The only two that stood out to me where the .cab files ??? and the one _INST32I.EX_ which I instantly renamed to .exe and attempted to run it. No luck however, as it instantly crashed. There is more to this story.
Earlier I noticed the "Preparing the InstallShield(R) Wizard" popup that took a suspiciously long time to go away. Turns out, if you open task manager after running Setpu.exe is not there. Instead it is replaced by _ISDEL.exe and _INS5576._MP.

These look suspiciously like the .EX_ and _isdel.exe files on the disk. The _INS5576._MP process is also bein ran from the Temp user directory. Super weird.
So I decided now was the time to outsource some of this research and look into any preexisting information on Install Shield itself. There is surprisingly little information about Install Shield and its inner workings, which is odd because it came bundled with Visual Studio for a time. Most of the references online are "This game from 20 years ago is broken and wont install bc of IS" and that's it.
However, I kept searching and came across the holy grail:
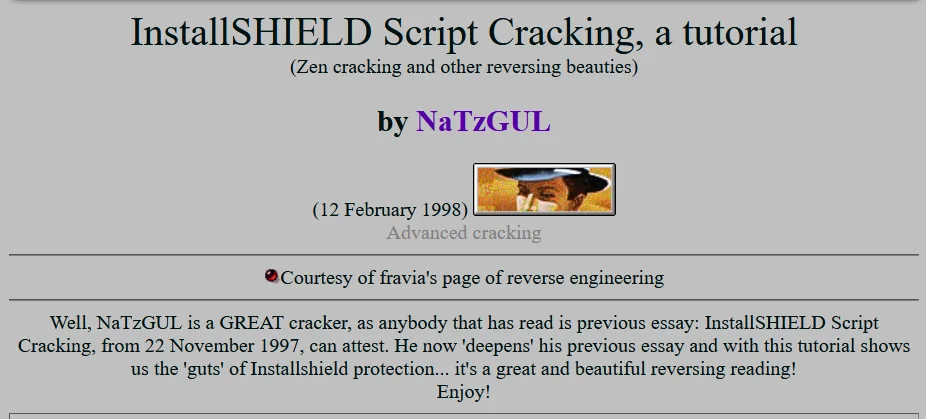
This article by NaTzGUL from 1997 saved me probably days of just watching the installer one instruction at a time in x86dbg, instead I got most of the rundown for what IS is, how it works, and how I'm going to crack Poser 4. As I'm not bothering with messing with the installation the cracking information isn't directly relevant but having a deeper understanding about IS helped immensely.
TLDR:
Setup.exelaunches_isdel.exe&_INS5576.exein a temporary directory_INS5576.exeis the "Install Shield Runtime" which handles installation by executing the.insfiles which are "Install Shield Scripts" and thrashes the registry with a ton of random junk._isdel.exeis solely responsible for deleting the Install Shield setup files copied into the temporary directory.- These scripts can have a rather wide range of functionality which makes reverse engineering IS installers tricky.
Now that we have the rundown of IS we can keep digging deeper to see if we can bypass that pesky serial check.
There do exist tools to extract the setup files from the
.cabfiles but that's cheating. Also the setup writes the serial key to a file so you don't have to input it twice. So I'll have two applications checking my work when writing a key generator.
These is the files the fake Setup.exe copies and then runs in the Temp directory:
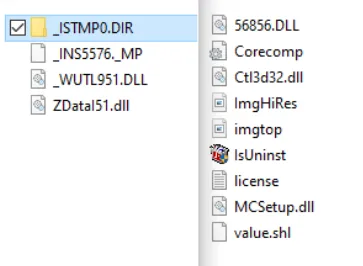
Nothing really stood out to me on first glance. I did however, immediately rename _INS5576._MP to Setup.exe for brevity. But it could never be that easy. When I tried to launch it, it would blink for a second, then vanish. Something was missing.
Step 2: Static & Dynamic Analysis
Its not a loop its a spiral
I wanted to find out how these sub processes get launched and ran the original setup.exe under Process Monitor and noticed they were being called by the WinExec function. Which is extremly helpful to know, however, PM also showed me the setup launcher wasn't passing in any command like arguments or anything special when starting it. I could follow execution in x32dbg and see exactly when the real setup is launched but it didn't show me anything that would be causing it to not run on its own. Luckily though, I nop'd the call to WinExec just to see what would happen (nothing) and noticed a new file appeared in the Temp directory that was hiding all the real instillation files. This new file called _INS5576.INI was now sitting here. Its contents are the missing arguments we need to finally run the real Setup.exe by itself.
-f"{SETUP_INS_PATH}" -z1 -cx -x{TEMP_DIR} -x1"{INSTALLER_PATH}" -q{NUM}
As soon as IS launches the real setup the newly running Setup.exe instantly deletes this INI file. At the same time however, will not launch without this file present.
This is finally the part where I cracked open Ghidra and started doing some bassline static analysis on how this all worked under the hood. Once I discovered the self immolation function I patched it out to hopefully make further progress easier.
I did learn something about IS in my time researching it. It's fake Setup.exe that launches the real version, at some point had a 16bit variant for opening on even older systems. This backwards - backwards compatibility, combined with the wonderfulness of Visual C++ (not MSVC, just VC) caused both Ghidra and IDA to stroke out.
But I kept going. Found the call to open the "Serial Key Invalid" message box which lead me directly to my original target which was hiding in: MCSetup.dll
One feature of Install Shield is the ability to supply your own DLL for serial authentication when creating an installer.
I have finally found all the pieces, now I just need to put them all back together the right way.
Step 3: Cracking the code
I am definitely the only person who has thought this much about Poser 4 in 30 years.
Now that I have MCSetup.dll identified I can start dissecting it to extract the real key verification logic. Again Ghidra was having a lot of issues so I kind of gave up on trying hard to fix the decompilation because just going of of vibes about what I think its doing and the assembly worked way better.
MCSetup.dll has 2 main exports. MCSerialCheck & MCSerialWrite, pretty self explanatory.
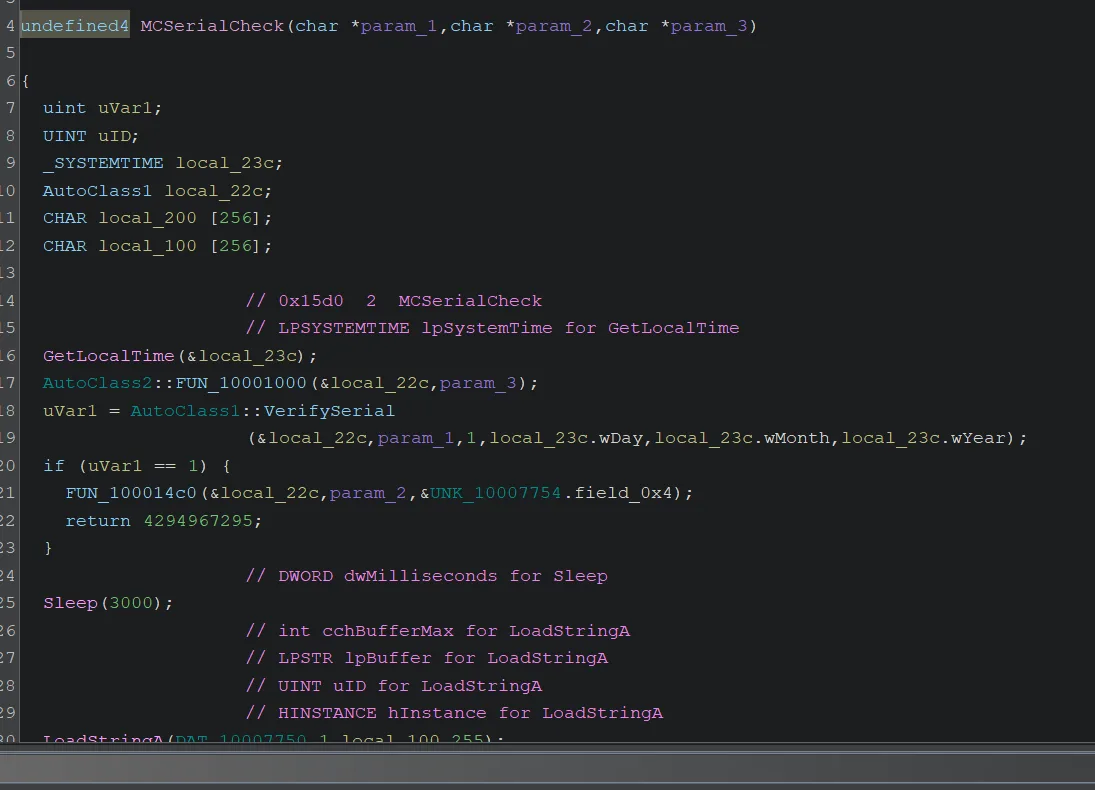
There is THE check the program makes to see if your serial key is valid. Obviously at this point we could just nop that call out and be done with this whole thing, but them I might as well just use the serial key that came on the box.
So from looking at the back of the box we can see the serial key follows this form.
XF83WBD-8473803-USE
XX##XXX-#######-XXX
XF - Is passed in from Setup.exe (Some sort of specific program or hardware identifier)
Now all I have to do is work through the code and reverse engineer this serial key.
The first half of the serial check function I like to call the 'Sanity Check'.
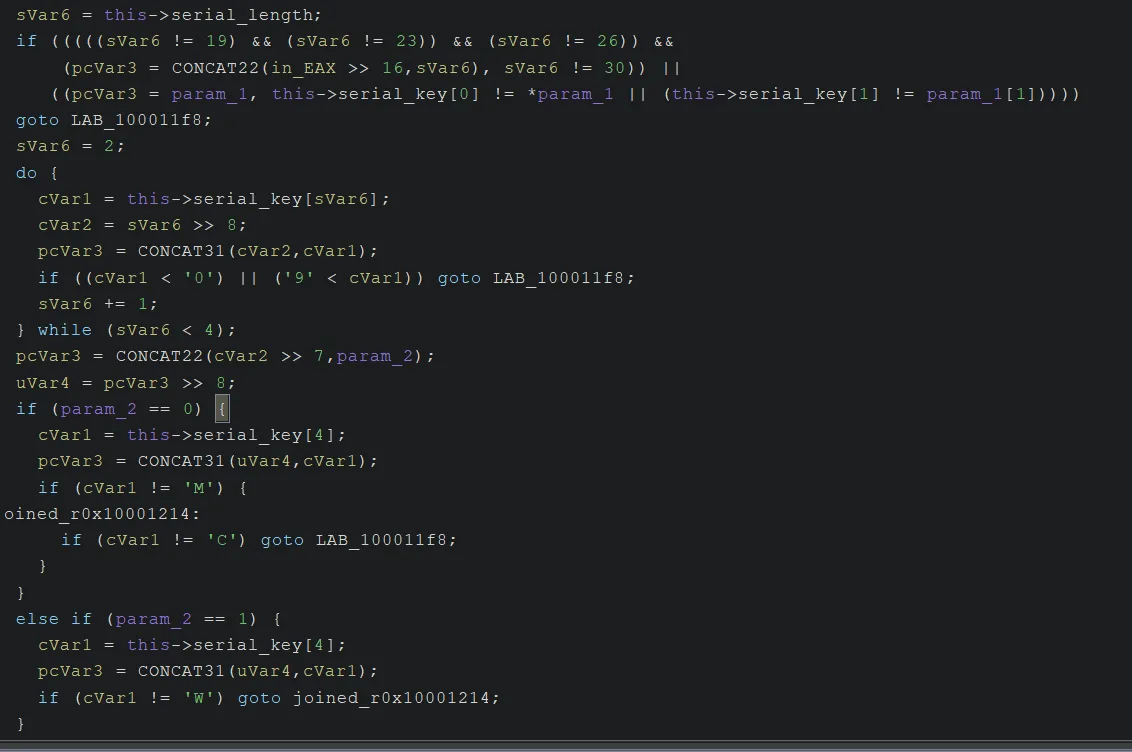
At first I was super tripped up with all the random CONCAT and duplicated local variables, however, I just decided to ignore most of it. Very clearly though.
So what we can gather so far is:
SERIAL_KEY
is - 19,23,26, or 30 characters in length
Character 0 is HWID 1
Character 1 is HWID 2
Character 2 is a Digit
Character 3 is a Digit
Character 4 is one of [M,C,W] depending on arguments from Setup.exe
Making real progress. The next section is fairly simple but a long one.
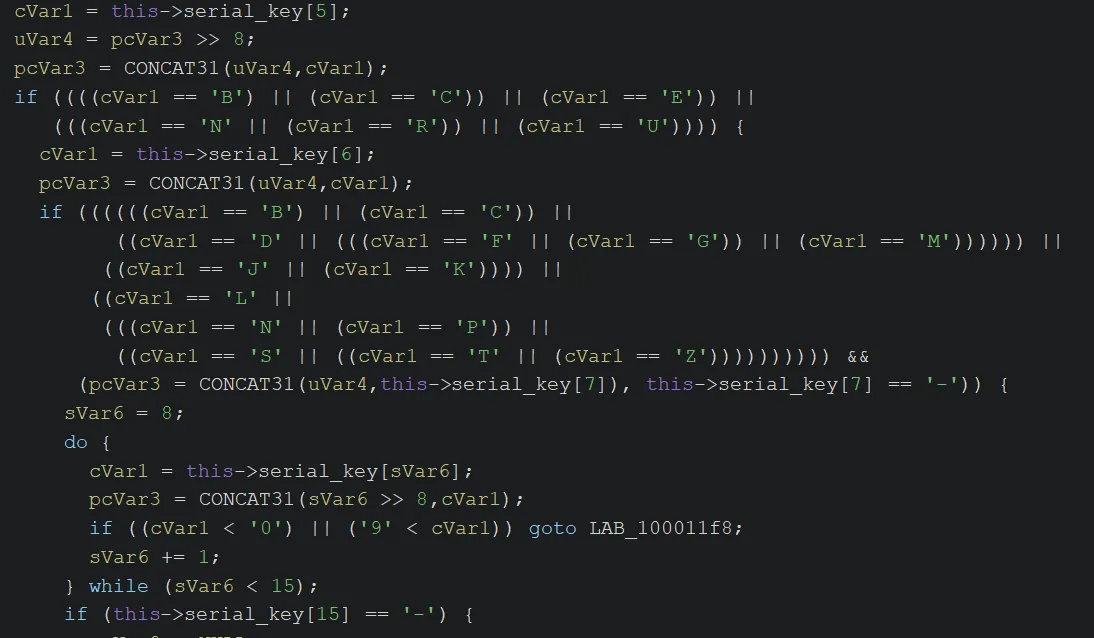
SERIAL_KEY
Character 5 is one of ['B','C','E','N','R','U']
Character 6 is one of ['B','C','D','F','G','M','J','K','L','N','P','S','T','Z']
Character 7 is '-'
Character 8-14 are digits
Character 15 is '-'
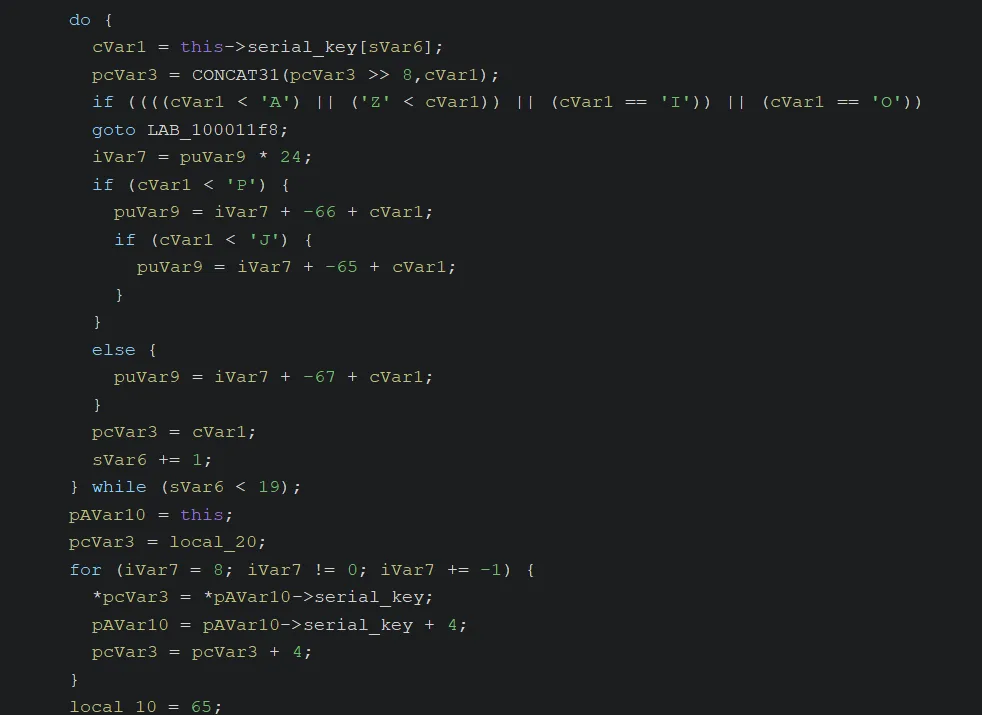
Very close. Looking back at a legitimate key. XX##XXX-#######-USE There are 3 letters that seem out of place at the end. This is where MCSetup.dll tries to pull one of its last tricks. The last 3 characters are a checksum value in base 24 for the entire serial key.
So now we can generate any valid key. We can ensure each digit fits within these rules. However, we now must also reverse engineer another function, the one that generates and verifies the checksum for the serial key.
On the MCSerialCheck function side its pretty simple just counts the value. This computed value must match the value returned by the checksum function or else it will invalidate the key. Once again you could just skip this instruction and the setup would continue as normal. However, I'm already in way to deep for a program I'm never going to use. So lets reverse engineer this checksum and get to writing a key generator.
The First half of the CHKSUM function along with my recreation in C just because Ghidra is ugly to look at.
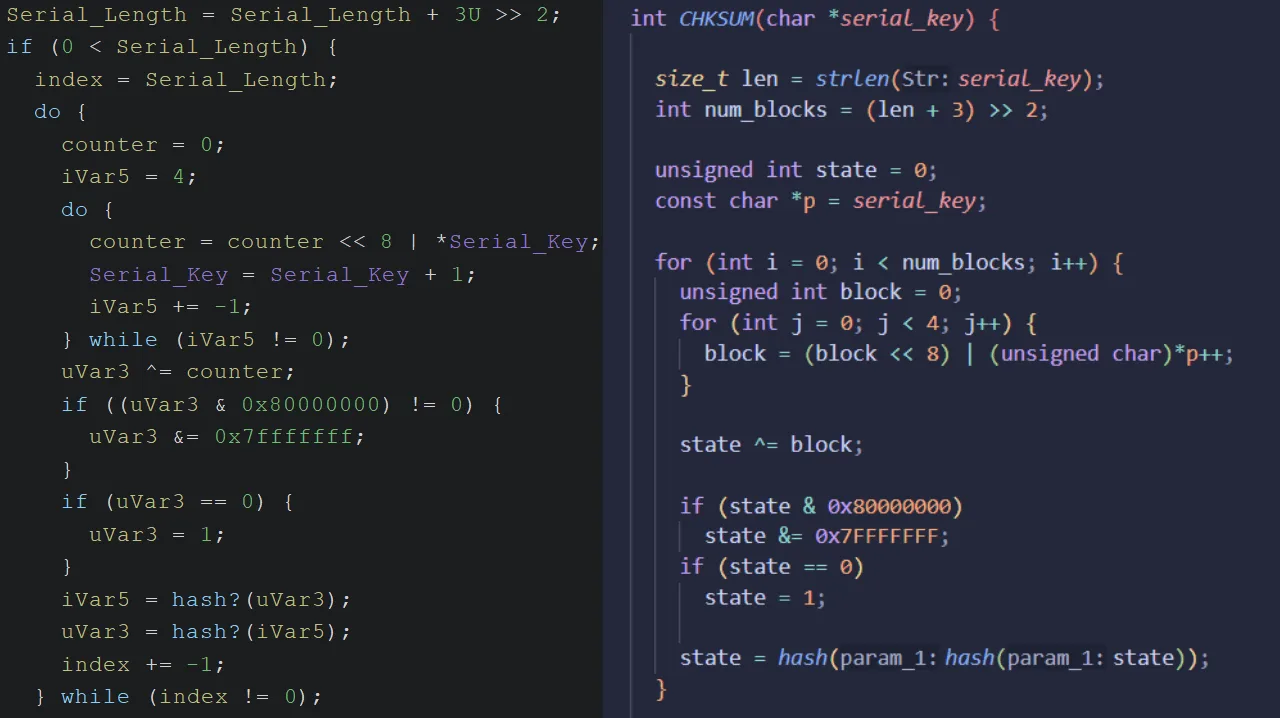
Not extremely complicated. It simply grabs 4 characters at a time and throws them into the hash blender twice.
The second half mixes things around one last time before one final blend by that same hash function.
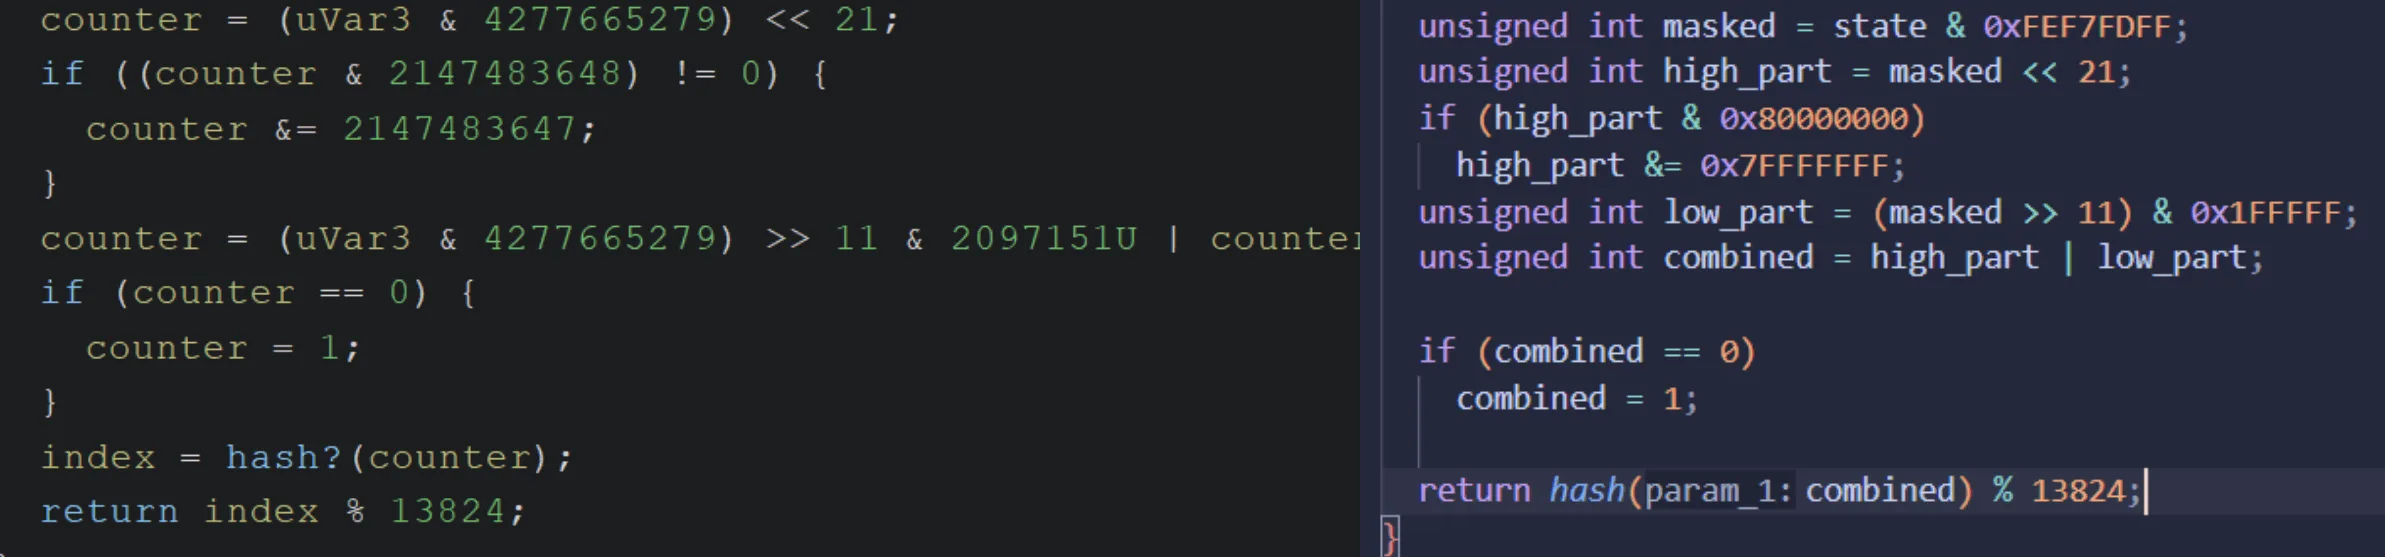
Now looking back at that hash function it finally hit me.
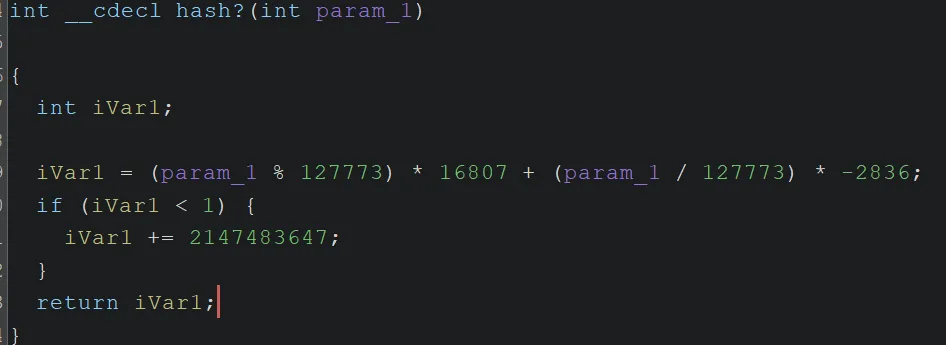
This entire checksum function is just a random number generator.
So what did algorithm did MetaCreations decide to secure their class leading 3d character animation software with. I can never be 100% ceartin but it looks suspiciously like one of those Linear Congruential Generator. More specifically this one example I found tailored specifically to avoid integer overflow.
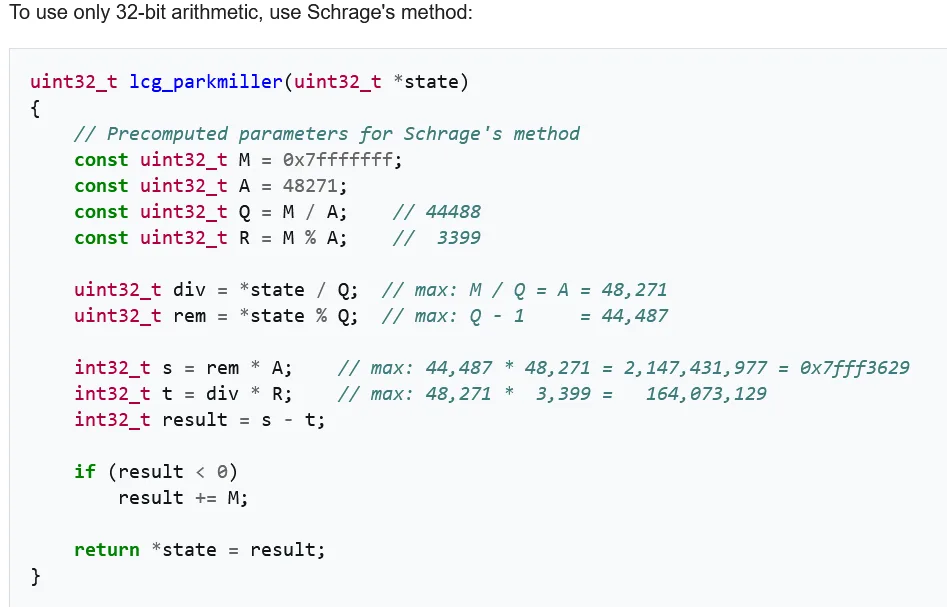 https://en.wikipedia.org/wiki/Lehmer_random_number_generator
The checksum function fed each digit of the serial key into this random number generator. The output then replaced the last 3 letters of the serial key. So that if the letters generated by the checksum equaled the three letters in the key, along with all the other verification checks, the serial key was accepted.
Now finally to what I really wanted to do in the first place, build my own working serial key generator.
For writing the keygen I decided to try nim bc it has this allure as this programming language for hackers because it compiles down to tiny, dependency-free executables and has a clean FFI for Windows APIs. I'm not 100% sure on the legality of sharing all of this part because this IS NOT A TUTORIAL. So I'll just show the coolest part which in order to generate the last characters for the serial key. I ran it through my previous reverse engineered checksum function to get the right value. And then extracted out the characters I would need from that.
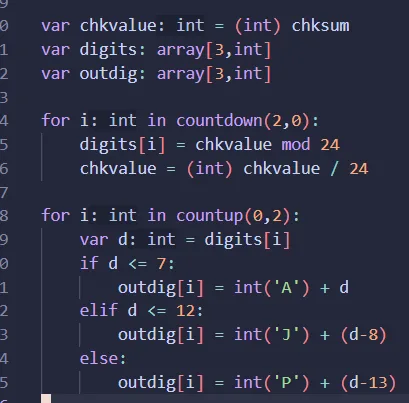
And finally....
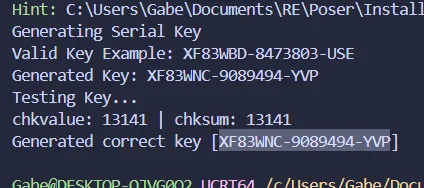
IT WORKS
In conclusion
The last Google Trends hit for Poser was 2009
I have dabbled a bit in Reverse Engineering before this, however, this was easily the hardest and most rewarding challenge I've came across. This project forced me to sharpen my skills using static and dynamic analysis tools and gave me the patience required to read and understand 16-bit asm generated by Visual Studio from the Clinton era. As well as reverse engineering a complex authentication algorithm and building a key generator for a real piece of commercial software.
Always stay curious about what's around you.
Gabriel Hawkins 6/12/26
Note: No proprietary code is reproduced here; the key generation algorithm is an independent re-implementation derived solely from observation of the software’s behavior.